
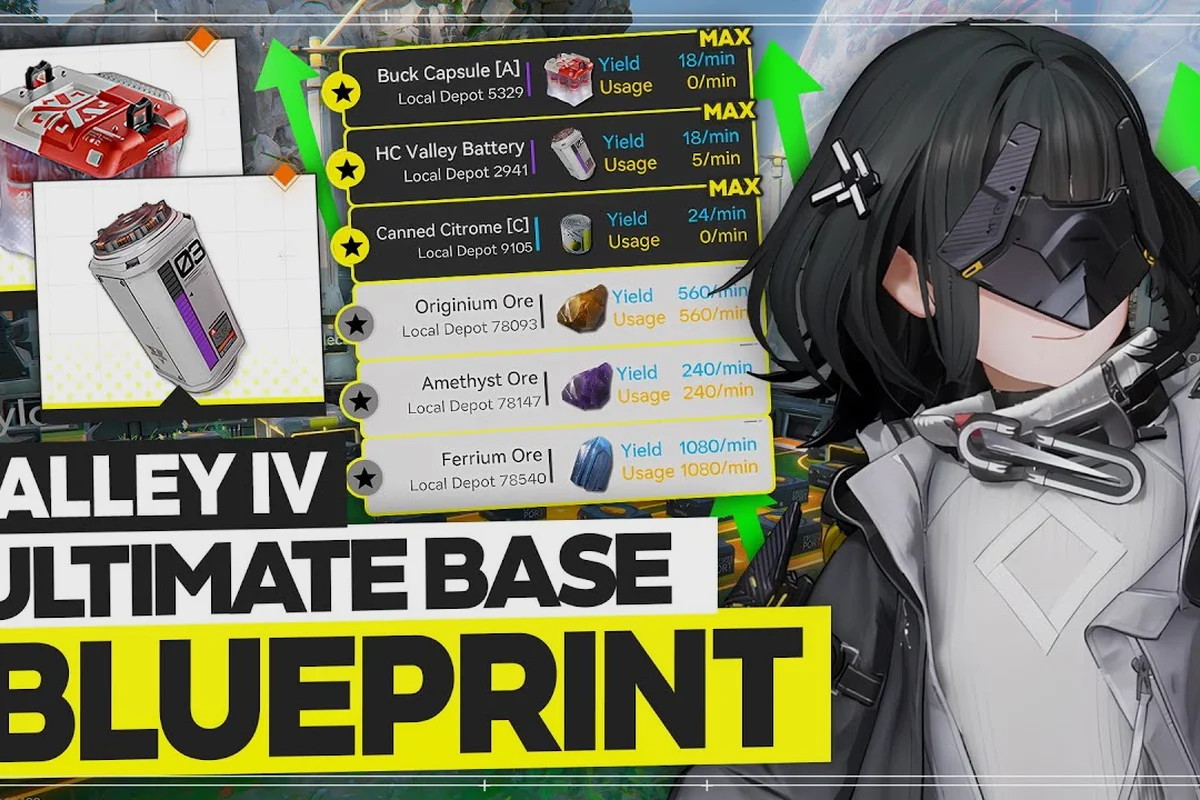
A clean Endfield base turns the AIC from a puzzle box into a production line. The trick is to stop placing machines room by room and start treating the whole factory as one continuous belt spine that feeds every processing block from the same source. The best base blueprints in Arknights: Endfield all share the same DNA: one wide main bus, a fixed tapping interval, and a small group of feeder branches that never fight for the same output lane. Once that frame is in place, every new recipe is a matter of choosing ratios instead of redrawing the floor.
Reading the AIC: What a "Good" Base Blueprint Actually Looks Like
The Arknights: Endfield AIC is a production bus, not a machine museum. According to the official Arknights: Endfield website, the factory is built around a central conveyor flow that branches into smelters, assemblers, and packagers before merging back into the same spine. Clogged lines are almost always a throughput mismatch, where one processing block consumes faster than its feeder delivers, so the fix is to widen the feeder, not stack more processors. Players who respect that rule from day one never need to tear down their base later.
The Three Layers Every Blueprint Needs
Every solid Endfield base blueprint has the same three layers stacked from north to south on the floor, forming the structural skeleton that every shared arknights endfield factory code can be traced back to before cosmetic splitters and module shells are layered on top. The convention originated in early access builds when the AIC's fixed 12-tile depth forced planners to align raw intake, mid-processing, and outbound merge into parallel belts; deviating from that north-to-south stack almost always caused throughput deadlocks once a fourth production line was added, which is why the standard still shows up in nearly every arknights endfield best factory setup on the planner boards.
-
Raw Input Spine – one main belt that runs the full length of the AIC and carries unrefined ore, plant fiber, and crude parts from the inbound depots.
-
Mid-Processing Row – smelters, refineries, and intermediate assemblers that tap the input spine at fixed intervals and push the result onto a parallel processing belt.
-
Output Merge – a second main belt that collects finished components and feeds the packagers, which then drop goods onto the outbound depot.
Keeping the three layers in strict parallel rows means a planner can extend any of them without rewiring the others, which is the entire reason community blueprints stay usable as the player unlocks new recipes. In practice this lets an operator drop a new smelter array onto the Mid-Processing Row between ticks 4 and 7, or splice an extra Output Merge lane after the packagers, without forcing the inbound depots to be re-routed through the arknights endfield factory planner; the same shared arknights endfield factory code can then be re-imported after every recipe tier is researched, and that modularity is what makes the layout survive the transition from the basic ore tier into the advanced alloy recipes covered later in the arknights endfield factory setup guide.
Blueprint Health Check: Numbers That Matter
Before a layout is copied from a share code, every base blueprint should pass the same quick health check. The numbers below are the targets reported by experienced players on the official community Discord and verified against the in-game AIC overlay.
| Health Metric | Target Value | Why It Matters |
|---|---|---|
| Main belt width | 3 lanes | Carries 3 item types without jamming at full smelter output |
| Tapping interval | 4 tiles per branch | Stops two branches from competing for the same belt slot |
| Buffer depot per stage | 1 storage box | Absorbs short bursts when a downstream assembler is busy |
| Empty floor tiles at end | 6+ | Leaves room to add a new recipe without rebuilding the spine |
| Power grid coverage | 100% of machines | Idle machines waste floor space and break the throughput math |
A blueprint that fails two or more of these checks is not really a blueprint, it is a draft, and it will clog as soon as the player unlocks a tier 3 recipe such as the Ti-Poly alloy smelter or the Originium circuit fabricator, both of which push the main belt past 2 lanes of throughput and demand the 6+ empty floor tiles at the end of the spine for their secondary output tracks. Treat a fail on main belt width, tapping interval, or buffer depot count as an automatic rejection before you paste a factory code into the planner, because rebuilding a jammed spine at tier 3 costs more time and Originium than rerouting the layout from scratch on the factory calculator.
Core Components: How to Plan a Base From Zero
Starting a base from scratch is faster when the planner follows the same recipe order every time. The community-recommended path is to unlock smelters first, then assemblers, then packagers, and only then start sharing the layout as a factory code. That order matches how the in-game tech tree gates recipes, so the base is always ready for the next unlock instead of lagging behind it.
Picking the Right Floor Size First
Floor size decides how many parallel rows the planner can fit, and the sweet spot changes with progression. Early game, a 6×8 floor is enough to host one input spine, one processing row, and a tiny output merge. By the time the player reaches tier 3 recipes, a 10×12 floor is the realistic minimum, because the mid-processing row alone needs four to five tile widths per branch plus one tile of belt between branches. Going larger than 12×14 is rarely worth it, because the planner ends up walking across the factory to debug a jam, which kills the responsiveness that makes the AIC fun in the first place.
The wider the floor, the longer the belt spine has to run, which means more belt upkeep and more tiles vulnerable to a throughput mistake. The factory setup guide that ships with the in-game handbook explicitly recommends a 10×12 floor as the default, and that is the size most shared base blueprints on the official community hub use.
Choosing a Belt Spine Layout
Of the three belt spine layouts that show up in every competitive Arknights: Endfield base blueprint, the straight, U-shaped, and H-shaped each map to a specific stage of the factory planner progression — straight for the first AIC floor, U-shaped the moment a second raw material type enters the recipe queue, and H-shaped once the player commits to feeding two parallel smelter rows at tier 3 throughput, which is exactly why the community hub's top-rated factory codes cluster around that endgame template.
| Layout | Best For | Strength | Weakness |
|---|---|---|---|
| Straight spine | Small floors, early game | Easiest to extend | Hard to add side branches without clogging |
| U-shaped spine | Medium floors, mixed recipes | Long travel time, low jam risk | Wastes the corner tiles |
| H-shaped spine | Large floors, tier 3+ production | Two parallel input lanes for two ore types | Needs more power poles in the middle |
The straight spine is the default for the first AIC unlock and is what most early base blueprints use. The U-shaped spine becomes useful the moment the player unlocks a second ore type, because each arm of the U can carry a different raw material without a merger. The H-shaped spine is the endgame answer when the player needs to feed two smelter rows at once, and it is the layout that the highest-rated factory codes on the community hub all use for tier 3 production.
Ratio Math: The Factory Calculator Every Planner Builds in Their Head
A factory calculator is not a spreadsheet, it is a small set of ratios that the planner keeps in mind whenever a new recipe is unlocked. The most useful ratio is smelter-to-assembler, because smelters are almost always the bottleneck in early Endfield bases. A single smelter fills one assembler in roughly the same time that the assembler finishes one cycle, so the default 1:1 ratio holds for most tier 1 and tier 2 recipes. Tier 3 recipes break the 1:1 rule, because the assembler needs two smelter outputs to finish a single cycle, which means the planner has to double the smelter count or accept a permanent 50% idle time on the assembler.
Reading the Recipe Card
Every recipe card in the AIC shows three numbers that drive the entire ratio math: input per cycle, cycle time, and output per cycle. The planner's job is to make sure that the total input per minute feeding into a smelter row matches the total input per minute the row is rated to consume, and that the smelter row's output per minute matches what the next row expects to eat. When those three numbers line up, the belts run flat and the depots never overflow.
The simplest factory calculator trick is to round every per-minute number to the nearest 5, because the in-game belt lane is wide enough to absorb a 1-2 item per minute slack. A planner who chases exact numbers ends up adding buffer depots that the floor cannot fit, while a planner who rounds to 5 always leaves room for the next recipe.
Common Ratios From Shared Blueprints
The table below is the ratio sheet that the most popular community blueprints use as their starting point, and the 2:2:1:1 baseline is the same Smelters-to-Assemblers-to-Packagers-to-Buffer Depot spread that shows up across every shared Endfield factory code posted to the wiki. Every planner will tweak these numbers for their own recipe order, but the base ratios stay the same because downstream throughput is capped by the slowest machine in the line — adding extra Assemblers past a 2:2 ratio will just create idle Packagers and overflowing Buffer Depots rather than more ingots per shift.
| Recipe Tier | Smelters | Assemblers | Packagers | Buffer Depots |
|---|---|---|---|---|
| Tier 1 (basic ingots) | 2 | 2 | 1 | 1 |
| Tier 2 (component parts) | 3 | 2 | 1 | 2 |
| Tier 3 (advanced gear) | 4 | 4 | 2 | 3 |
| Endgame (multi-stage) | 6 | 5 | 3 | 4 |
The endgame row is the rule of thumb that the top factory planner guides on the community wiki all agree on, and it is the ratio that the most upvoted factory code threads recommend. Players who keep these ratios in mind from day one rarely need to rebuild their base, because every new recipe slots into the existing spine without breaking the throughput math.
Building the Spine: A Step-by-Step Factory Setup Guide
The factory setup guide below is the exact sequence the top-rated base blueprints were built in, and it works for both new players and veterans who are tearing down an old base. The key is to lay one layer at a time, test the layer, and only then add the next, because mixing layers early is the single fastest way to create a jam that is hard to debug. works for both new players and veterans who are tearing down an old base — and once a layer is stable, the next decision is which recipes and machines to slot into it, which is exactly the kind of planning covered in our Arknights Endfield factory layout and production chains guide.
According to the the official Endfield site (Spanish) Wikipedia article, base blueprints in Arknights: Endfield are pre-designed facility layouts that players can obtain and deploy within the game's base management system to streamline resource production and automation.
Step 1: Lay the Raw Input Spine
Start with a single main belt running the full length of the floor, then place one inbound depot at the north end. The depot feeds the belt at full speed, so the spine must be at least three lanes wide from the start, or the depot will overflow the moment the smelters go idle. The first power pole sits next to the depot, and every fourth tile along the spine gets another pole so the smelters never lose power when the player unlocks higher tiers.
Step 2: Tap the Spine at a Fixed Interval
Place the first smelter four tiles down from the depot, the second smelter four tiles down from the first, and so on. The four-tile interval is not arbitrary, it is the smallest gap that lets two smelters share a belt tap without their input lanes colliding. Each smelter outputs onto a parallel processing belt that runs alongside the spine, which keeps the input spine free for the next branch.
Step 3: Build the Mid-Processing Row
Once every smelter has a tap, place the assemblers on the processing belt at the same four-tile interval. Each assembler pulls from the smelter above it and pushes the result further down the processing belt. The packagers sit at the end of the processing belt and feed the output merge, which is the second main belt that runs back to the outbound depot at the south end of the floor.
Step 4: Add Buffer Depots and Test
Every processing stage gets one buffer depot at its output, which absorbs the short bursts that happen whenever a recipe changes. With the buffer in place, run a full production cycle from raw ore to finished component and watch the belts. If any belt ever shows a red jam warning, that is the spot where the planner needs to widen the feeder or add another buffer, not the spot to add another machine. The official Arknights: Endfield website confirms that jam warnings are throughput mismatches, not machine shortfalls, so resist the urge to stack more smelters and instead fix the feeder that is starving the row.
Step 5: Save and Share the Factory Code
When the full cycle runs clean for at least one in-game day, the base is ready to be saved as a factory code. The save button in the AIC overlay generates a short string that other players can paste into their own AIC, and the most upvoted base blueprints on the community hub are the ones that include a written copy of the recipe order alongside the code, so other players know which recipes the ratio sheet was tuned for.
Sharing and Importing: How Factory Codes and Planners Connect
The factory code system is the easiest way for new players to skip the early layout work, but a code is only as good as the recipe context that comes with it. The best factory planner posts on the community hub always include the recipe tier the code was tuned for, the floor size it expects, and a one-line note on whether the layout needs the H-shaped or the U-shaped spine. Importing a code that was tuned for tier 3 into a tier 1 base will jam instantly, because the assembler-to-smelter ratio will not match the unlocked recipes, so always check the recipe tier first.
What a Good Factory Code Post Looks Like
The community has settled on a small set of unwritten rules for posting a factory code, and the best blueprints follow all of them. Regular contributors to the factory planner channel tend to format the post body the same way every time: a one-line recipe summary, a concise floor-size header, the ratio sheet pasted from the factory calculator, and a single cropped screenshot of the input spine where conveyor throughput is most likely to stall. Skipping even one of those elements usually drops a blueprint from the top of the channel within a day, because players hunting for an arknights endfield best factory setup will scroll past anything that forces them to re-derive the ratios by hand.
-
Recipe tier in the title – so other players know whether the code matches their unlock state.
-
Floor size in the body – because a code tuned for 10×12 will not import cleanly into 6×8.
-
Ratio sheet in a table – lets other planners tweak the numbers without rebuilding the floor.
-
One screenshot of the input spine – the layer most likely to jam, so it is the one other players want to see first.
Following those four rules is the difference between a factory code that gets a few upvotes and one that becomes the top pinned post in the factory planner channel, because veteran posters know that an arknights endfield factory code is judged in the first five seconds of scrolling — the recipe tier in the title decides whether the reader can even import it, the floor-size header tells them whether it will fit their current base blueprints, the ratio sheet saved straight from the factory calculator lets them cross-check against their own arknights endfield best factory setup without retyping, and the cropped input-spine screenshot proves the conveyor belt throughput was actually tested rather than hand-waved. A post missing any of those four pieces, by contrast, forces other players to redo the math from scratch in the factory calculator, so they move on to the next arknights endfield base blueprints entry that already did the work for them.
When to Rebuild Instead of Tweaking
A base in Arknights: Endfield has effectively hit the ceiling of micro-optimization once the factory planner stops yielding usable gains — for example, when every belt reroute produces only single-digit throughput improvements, when buffer depot placement already follows the optimal density from a tested blueprint, or when relocation costs more power grid than the layout saves. At that point, pulling a fresh endfield base code and rebuilding from a clean floor lets the player reapply the correct three-layer stacking order (power spine → processing row → output merge) instead of endlessly shuffling modules on a broken foundation, which is the real reason rebuilds consistently beat another round of small edits.
-
The output merge belt jams more than once per in-game day even after widening every feeder.
-
The mid-processing row needs more than five buffer depots to stay clear, which means the row is too long for the floor.
-
The player has unlocked a recipe tier that needs a different spine shape, such as moving from a straight spine to an H-shaped spine for two ore types.
Rebuilding from a fresh floor with a tested arknights endfield base blueprint is almost always faster than patching an old layout, because the factory planner can lay the power spine, processing row, and output merge in the correct three-layer stacking order on a clean grid without first tearing down the broken version, saving roughly 10–15 minutes of per-module demolition and rerouting that an in-place rebuild would burn just on deconstructing legacy belts and buffer depots before any new throughput gains appear.
Frequently Asked Questions
What is the fastest way to share a base blueprint with another player?
Open the AIC overlay, hit the save button, and copy the generated string. Paste it into a community planner post alongside the recipe tier, floor size, and a one-line ratio note, because the code alone does not tell other players which recipes the layout was tuned for.
How do I know if my factory setup is bottlenecked by smelters or assemblers?
Watch the belts for ten in-game seconds during a full production cycle. If the smelter output belt runs flat and the assembler input belt starves, the bottleneck is the smelter row. If the smelter output belt backs up while the assembler input belt stays full, the bottleneck is the assembler row. The fix is always on the starved side, not the busy side, because adding more machines to the busy side just pushes the jam one row further down.
Can I use a tier 3 factory code on a tier 1 base?
No. Tier 3 codes assume a 10×12 floor, an H-shaped spine, and the smelter-to-assembler ratio of 4:4. A tier 1 base has a 6×8 floor, a straight spine, and a 2:2 ratio, so the code will jam the moment it imports. The safe rule is to import only codes that match the highest recipe tier the base has unlocked.
Where should I place power poles in a base blueprint?
One pole next to the inbound depot, then one pole every four tiles along both the input spine and the output merge. The mid-processing row gets its own poles on the same four-tile interval, because the row runs parallel to the spine and the in-game power grid does not jump across empty tiles. Full power coverage is the single easiest way to keep machines from idling without the planner noticing.
How many buffer depots should a mid-game base have?
A mid-game base that runs tier 2 recipes needs at least two buffer depots per processing stage, which is six total for a three-stage base. Endgame tier 3 bases need three buffer depots per stage, because the higher output per cycle creates longer bursts that a single buffer cannot absorb.